Most people learn to squat by watching someone else squat. They copy the stance, the depth, the bar position and then spend years wondering why it never feels right. How to squat for your body type is one of the most individual things in the gym. Your limbs are a different length. Your hips are shaped differently. Your mobility restrictions are your own. If you're squatting someone else's squat, you're going to hit a wall and stay there.
The goal here is to find the squat that fits how your body actually moves.
Step 1: Figure Out Your Limb Lengths Before You Change Anything
Stand barefoot against a wall. You need two measurements:
- Your total height: floor to the top of your head
- Your leg length: floor to the front of your hip bone. Press in just below your belt line on either side and you will feel a bony point. That is the anterior superior iliac spine (ASIS). Measure from the floor to that point.
Divide your leg length by your total height. That number is your ratio.
If you land in the average range, there is one more check. The calculator will ask for your tibia and femur lengths, because for average legs the question is where the length sits.
Below 0.44 means you have short legs relative to your torso. Your anatomy naturally favors an upright squat. Staying tall is built into your proportions. You have the advantage on anterior chain exercises like the squat, and the disadvantage on posterior chain exercises like the deadlift.
Between 0.44 and 0.47 is average. Here the leg length alone does not tell you enough, because two people with the same number can have the length in different places. Measure your tibia (ankle bone to the top of the kneecap) and your femur (top of the kneecap to the front of your hip bone) and divide tibia by femur. If your tibia is 78% of your femur or less, the length is in your femur and you should train like someone with long legs. If your tibia is 85% of your femur or more, train like someone with short legs. Between 79% and 84%, standard squat cues work reasonably well for you, but you still need to understand your weak points before you start loading.
Above 0.47 means you have long legs. Expect forward lean in your squat. It’s normal for your proportions. Your torso has to counterbalance your legs, and the longer they are, the more it has to lean. Program around it instead of fighting it. You have the advantage on posterior chain exercises and the disadvantage on anterior chain exercises, so your squat needs more assistance work than your deadlift does.
Write your number down. Everything from here builds on it.
For me, it was powerlifting cues. I learned to squat in a powerlifting context, which meant I spent years ingraining "screw your feet into the ground" and "spread the floor." You've heard them. Everyone has.
The problem is those cues are built for a wide-stance, low-bar powerlifting squat and if you apply them to a high-bar squat, you're creating a faulty movement pattern from day one.
I didn't figure that out until I had a bad knee injury on a front squat. My knee was collapsing inward and I was fighting it by pushing out, which is exactly what "spread the floor" teaches you to do. The issue is that a proper full squat actually requires internal rotation of the femur. When you fight that, you're working against the joint. My body was essentially pulling in two directions at once, and eventually something gave.
That injury was the first time I actually stopped and questioned the cues I'd been using for years. Turns out I wasn't squatting wrong because I was weak or unfocused. I was squatting wrong because I learned a squat that wasn't designed for what I was trying to do.
Squat Form for Long Legs and Long Femurs
If you have longer legs, forward trunk lean during your squat is going to shift tension to your hips and away from your quads. To get more quad development, you need to either change your exercise selection or manipulate your foot position. The best exercises for this are:
Cyclist squats (feet close together, heels elevated): these force your knees forward and crush the quads directly.
Barbell hack squats: high heel elevation, with your knees tracking forward right over your toes.
Heels elevated squats: even a 5 pound plate under your heels can make a massive difference in torso position.
Squat Form for Shorter Legs
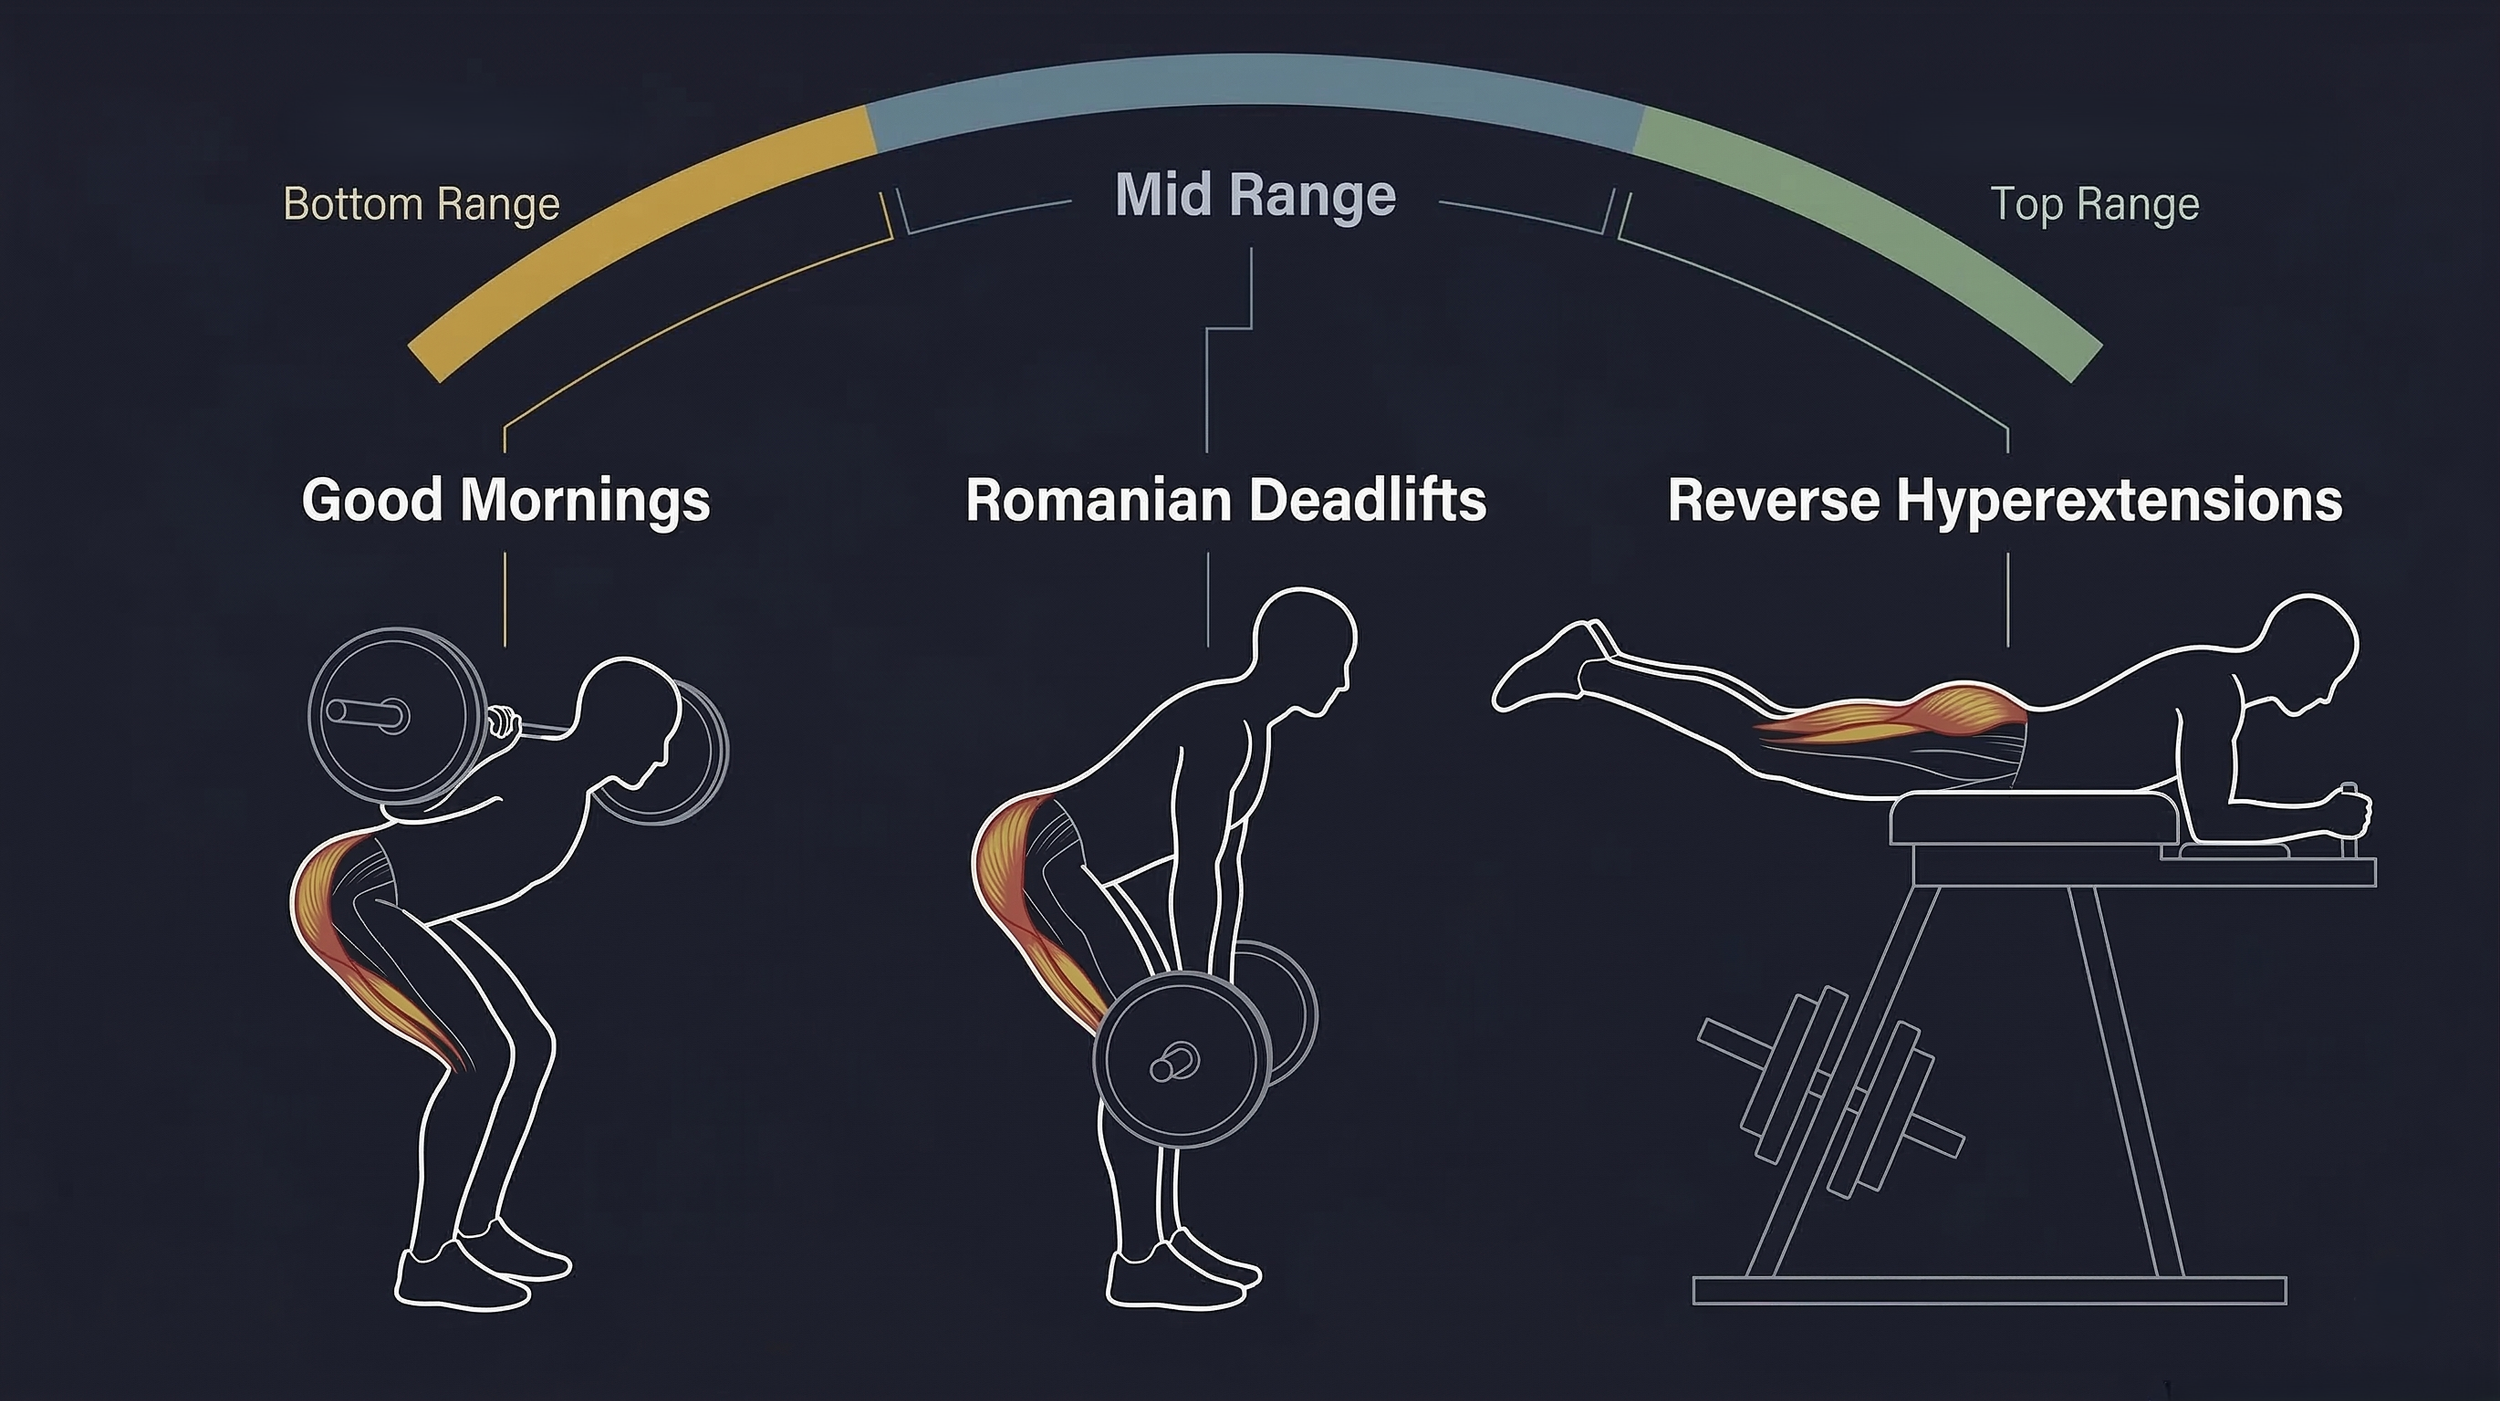
If you have shorter legs, your anatomy naturally favors knee flexion, which means you're probably already decent at squatting with an upright torso. Your weak link is more likely the posterior chain: hamstrings, glutes and spinal erectors. The exercises you need to be doing are:
Good mornings: these target the bottom range of hip extension, where most people are weakest.
Romanian deadlifts: the middle range of hip extension, excellent for hamstrings and lower back.
Reverse hyperextensions: the top range, great for glutes and spinal erectors without compressive load.
One thing I never see people do is train all three ranges of the strength curve intentionally. Most people pick one posterior chain exercise and do that forever. But your strength curve has a bottom, a middle and a top, and if you neglect any of them, you leave size and strength on the table.
Step 2: Find the Mobility Restriction That's Killing Your Squat Depth
A squat requires your ankles, knees, hips and shoulders to all work together inside a full range of motion.
If one of those links is restricted, your body will compensate somewhere else and that compensation is almost always where the injury shows up.
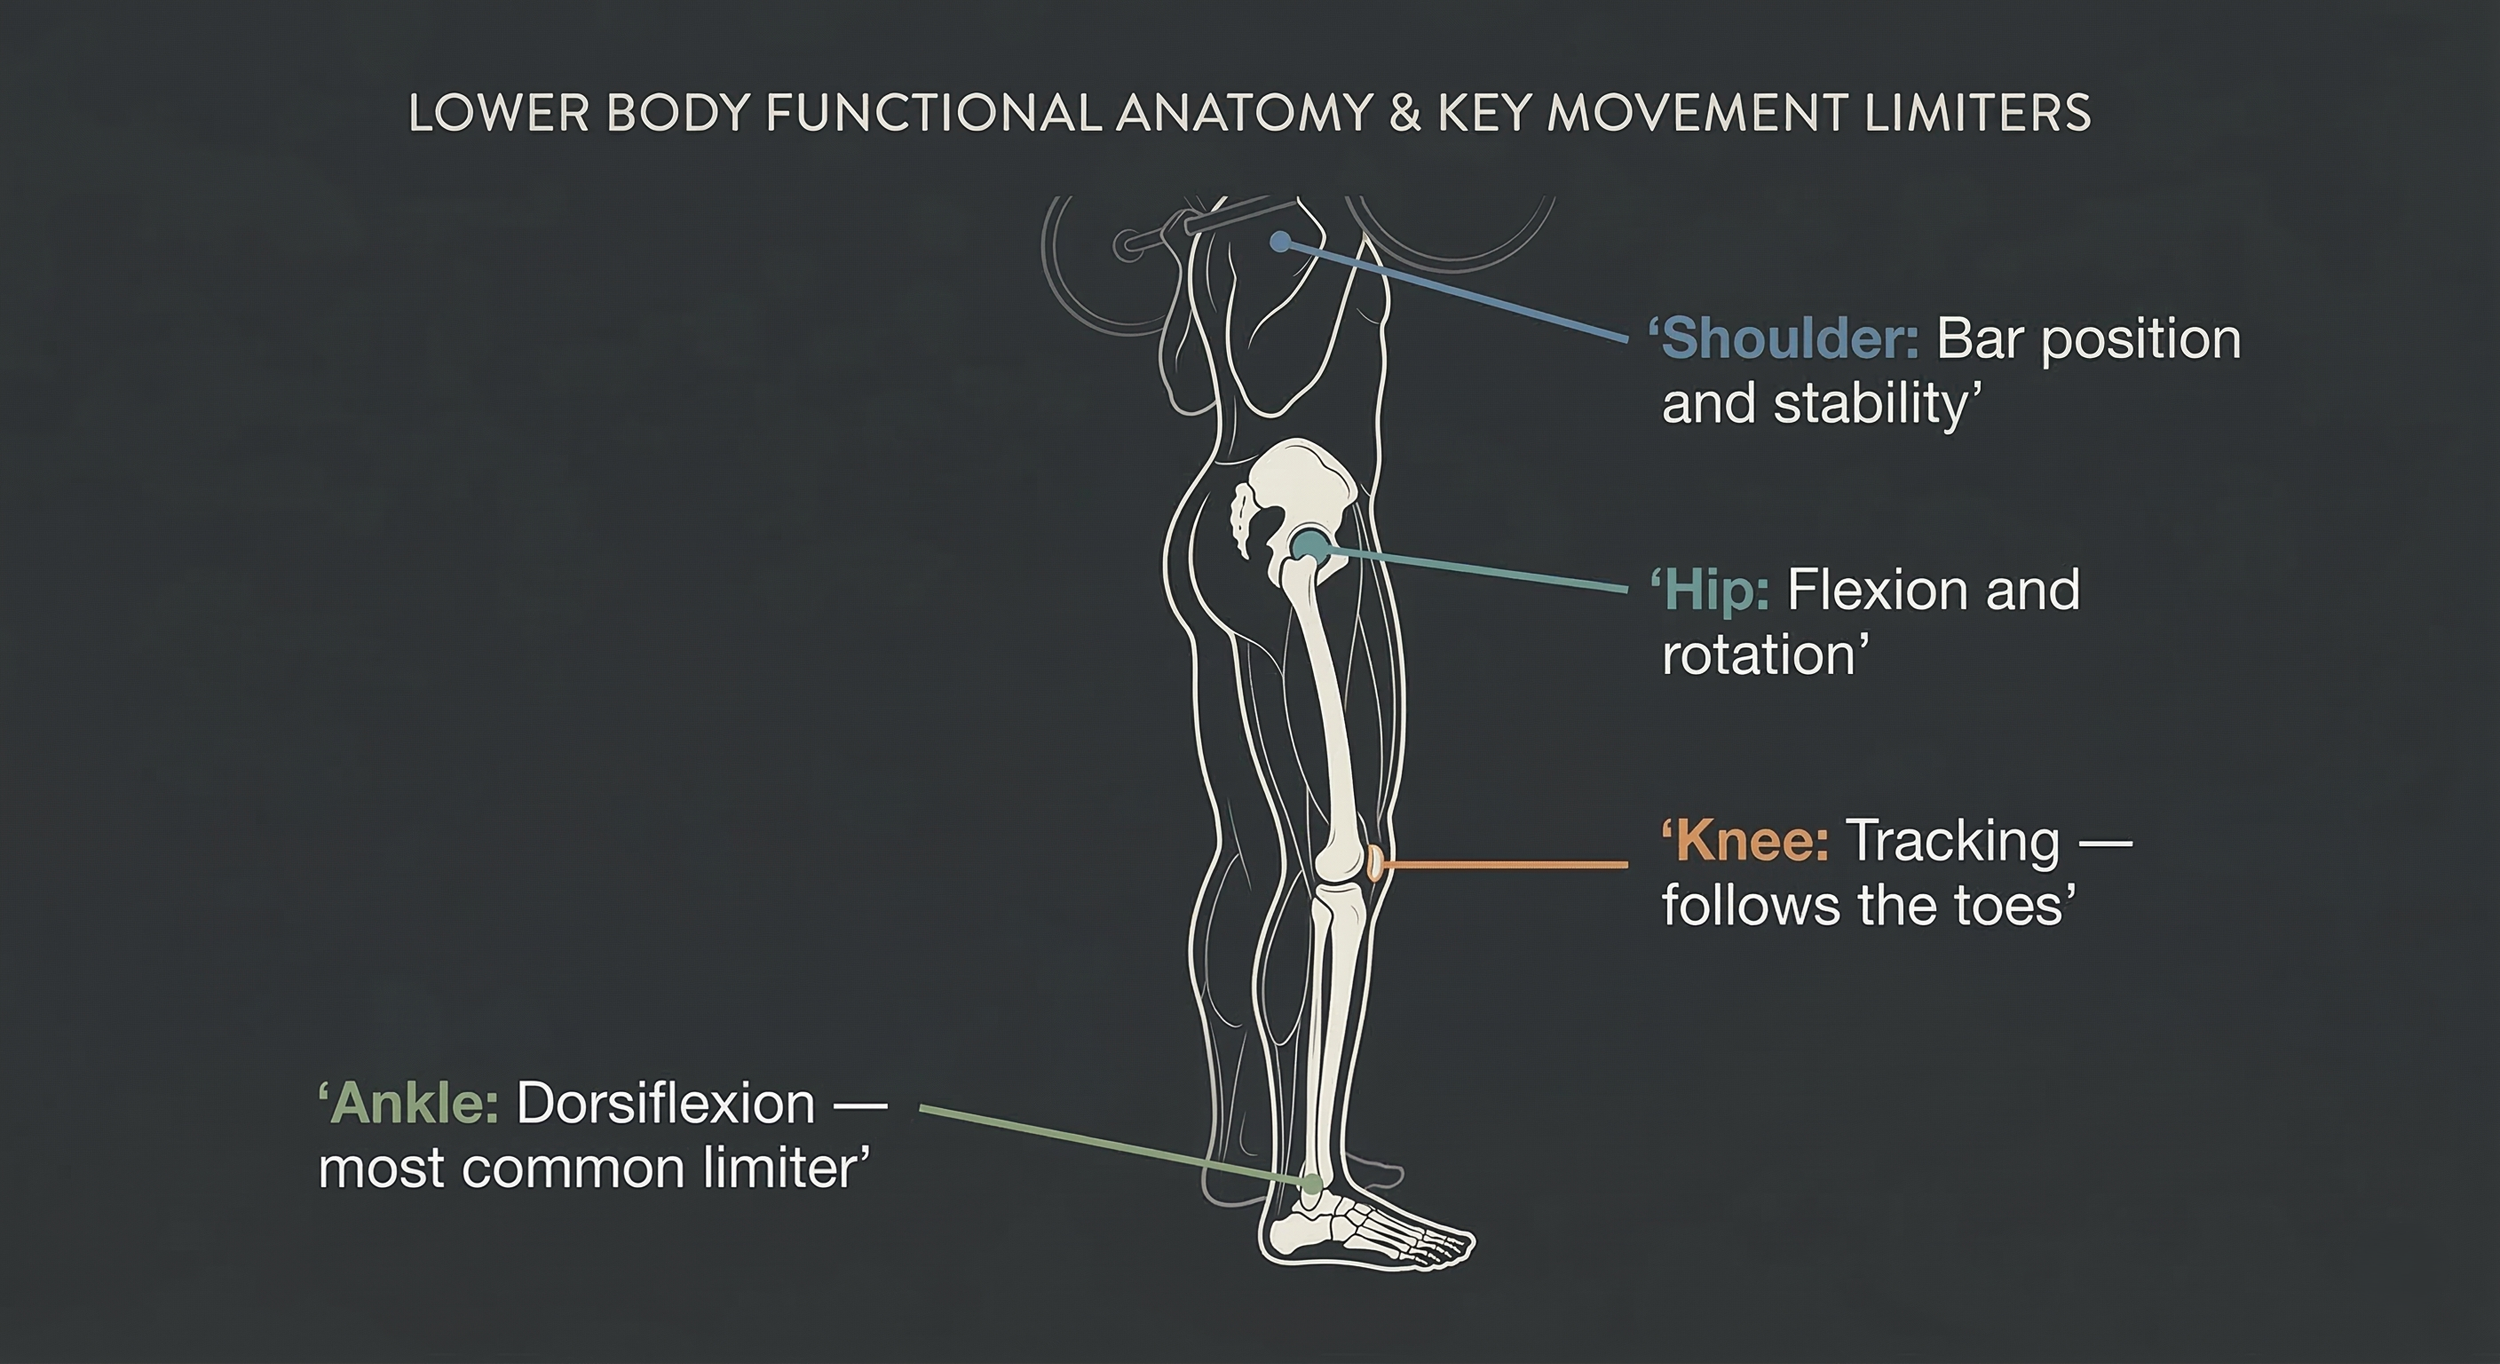
The four areas I look at first:
Ankle flexion: this is the most common limiter for squat depth. Tight ankles force your heels to rise or your torso to pitch forward.
Hip flexors: when they're tight, your pelvis loses its position at the bottom of the squat. One sign is butt wink, where your pelvis tucks under and your lower back rounds under load.
Shoulder mobility: if you're back squatting, you need enough shoulder external rotation to hold the bar without your elbows dropping.
Piriformis and hip rotators: when these are tight, you'll feel it as discomfort or a pinching sensation in your hips at depth.
The restriction that held me back the longest wasn't my ankles or my hips in isolation. It was that I had no idea how to use them independently. I was dumping everything into my lower back and pelvis at once, treating the squat like one big movement instead of a sequence of joints working in order.
What changed it was learning a joint-by-joint approach. Instead of just "squatting down," I started thinking about my ankles first, letting them flex and drive my knees forward. Then my knees, tracking in line and loading the quad. Then my hips, flexing last, controlled, not just collapsing into them. Ankles, knees, hips in that order, one segment at a time.
It sounds simple. It took months to actually feel it. But once I could segment the movement that way, the tension I used to dump into my lower back and pelvis started going where it was supposed to go. My squat got deeper without any new mobility work. I stopped feeling completely demolished after a heavy squat day. The tight hip flexors, the knee pain, all of it started to settle down once the movement actually made sense in my body.
That's the joint-by-joint approach. It's a way of thinking about how the movement should flow, and it's what most people are missing.
For ankle work, I'd have you doing 1 to 2 sets of loaded stretches on a seated calf raise machine paired with a kneeling tibialis anterior stretch where you sit back on your ankles and let the front of the shin open up. Do this before every lower body session, 5 to 10 minutes before you load anything.
For hip flexors, the couch stretch is the gold standard. Two minutes per side minimum before training. If you want to actually change tissue length over time, you need 5 to 10 minutes of sustained work 4 to 5 days per week for at least 8 weeks. Treat it as a dedicated mobility practice, separate from your warm-up.
If your shoulder mobility is the problem, I'd rather you not put a barbell on your back until you can get into position without pain. Use a safety squat bar in the meantime. It changes the load angle, takes the shoulders out of it entirely, and you can keep building strength while you work on the restriction. But you also need to be actively training shoulder external rotation and opening up your pecs and lats. Stretching alone won't fix it. You need to build strength through the range you're trying to recover.
Step 3: Train the Stabilizer Muscles Nobody Talks About
The squat looks like a quad and glute exercise. It is. But it's also a test of everything holding your torso together under load. If your stabilizers are weak, your form falls apart the second the weight gets heavy and you'll wonder why your technique "breaks down" even though you've been squatting for years.
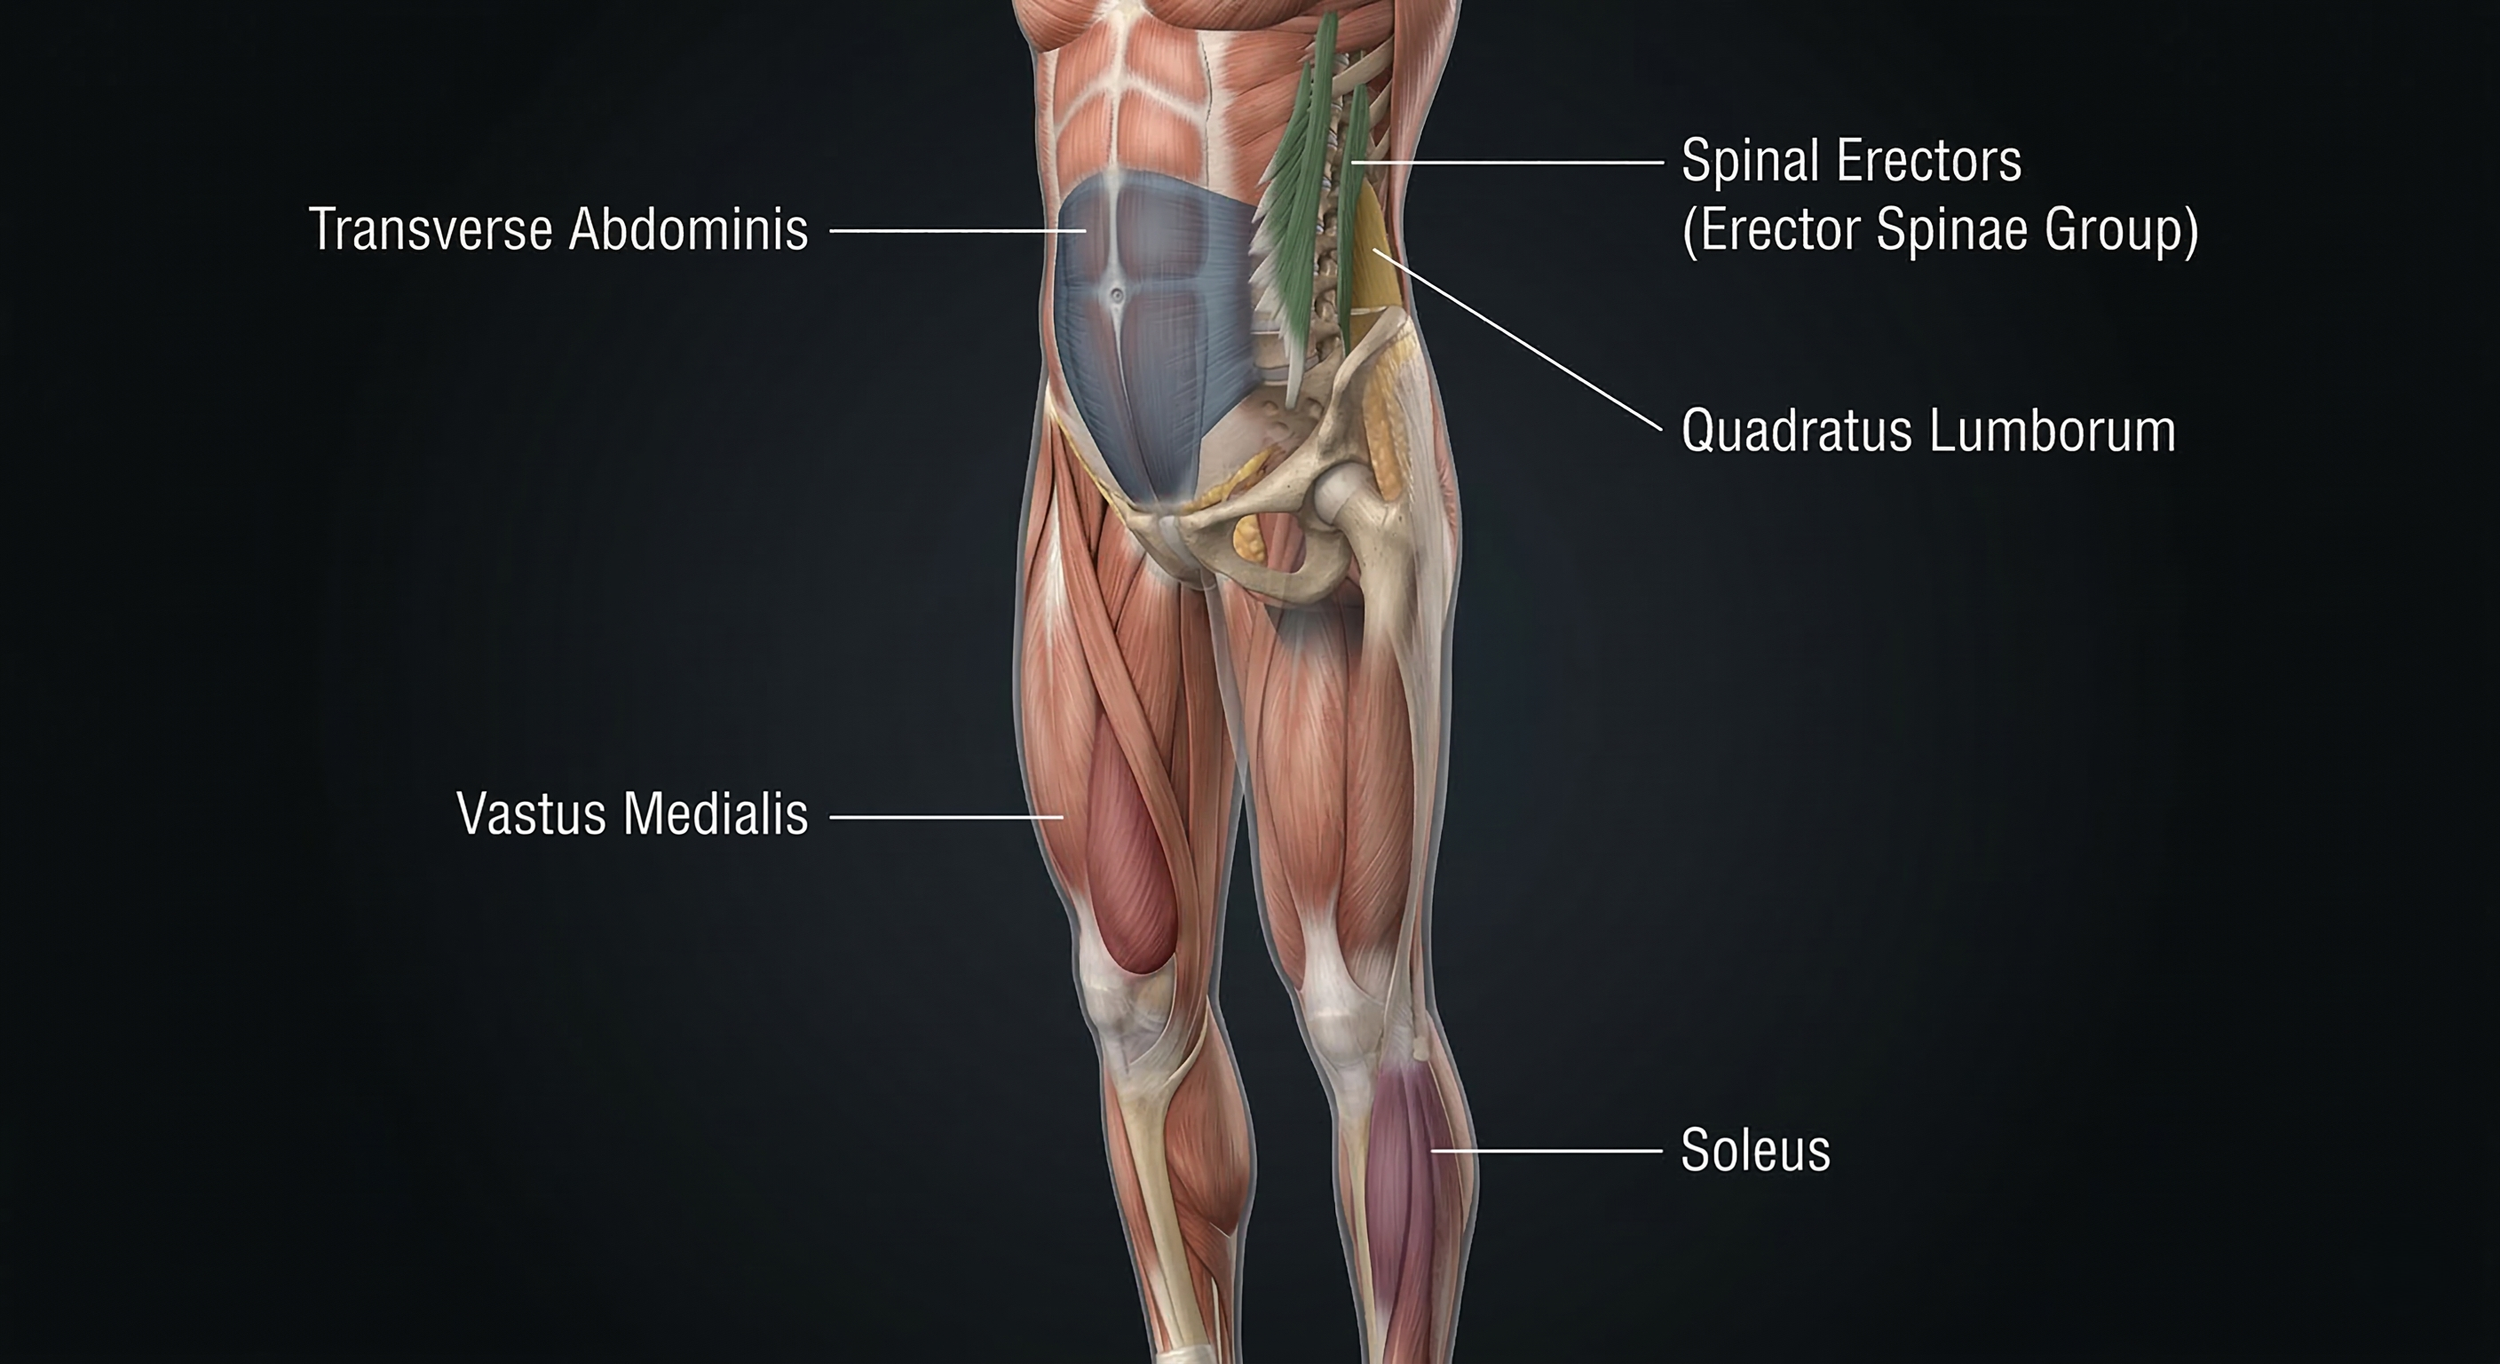
These are the muscles holding it together:
Abdominals: your deep core (transverse abdominis), the layer underneath your six-pack. Most people cue “brace your core” and call it a day. I don’t. When your core is actually strong enough, it does its job automatically under load. You don’t think about it, you don’t cue it, it just works. If your lower back is rounding or your torso is collapsing, your core needs more strength. Train it the way you train any other weak muscle.
Vastus medialis: the teardrop muscle on the inside of your knee. When this is weak, your knees cave. Most people never directly train it.
Lower back (spinal erectors): weakness here means a rounded lower back under load, which is how people get hurt.
QL (quadratus lumborum): this stabilizes your pelvis laterally. When it's weak, you'll see a lateral shift in the squat, where one hip drops.
Calves: both the gastrocnemius, which crosses the knee, and the soleus contribute to knee stability and force transfer into the floor. Most people only train them as an afterthought.
For the VM specifically, add 3 sets of Poliquin Step-Up at the end of every lower body session. Start with 20 to 25 reps. Since the range of motion is so short, you need a lot more reps.
Aim for 60 to 75 seconds per set, taking each set close to failure.
For QL work, 3 sets of side planks, 60 to 75 seconds per side is a good starting point to build a base level of strength and endurance.
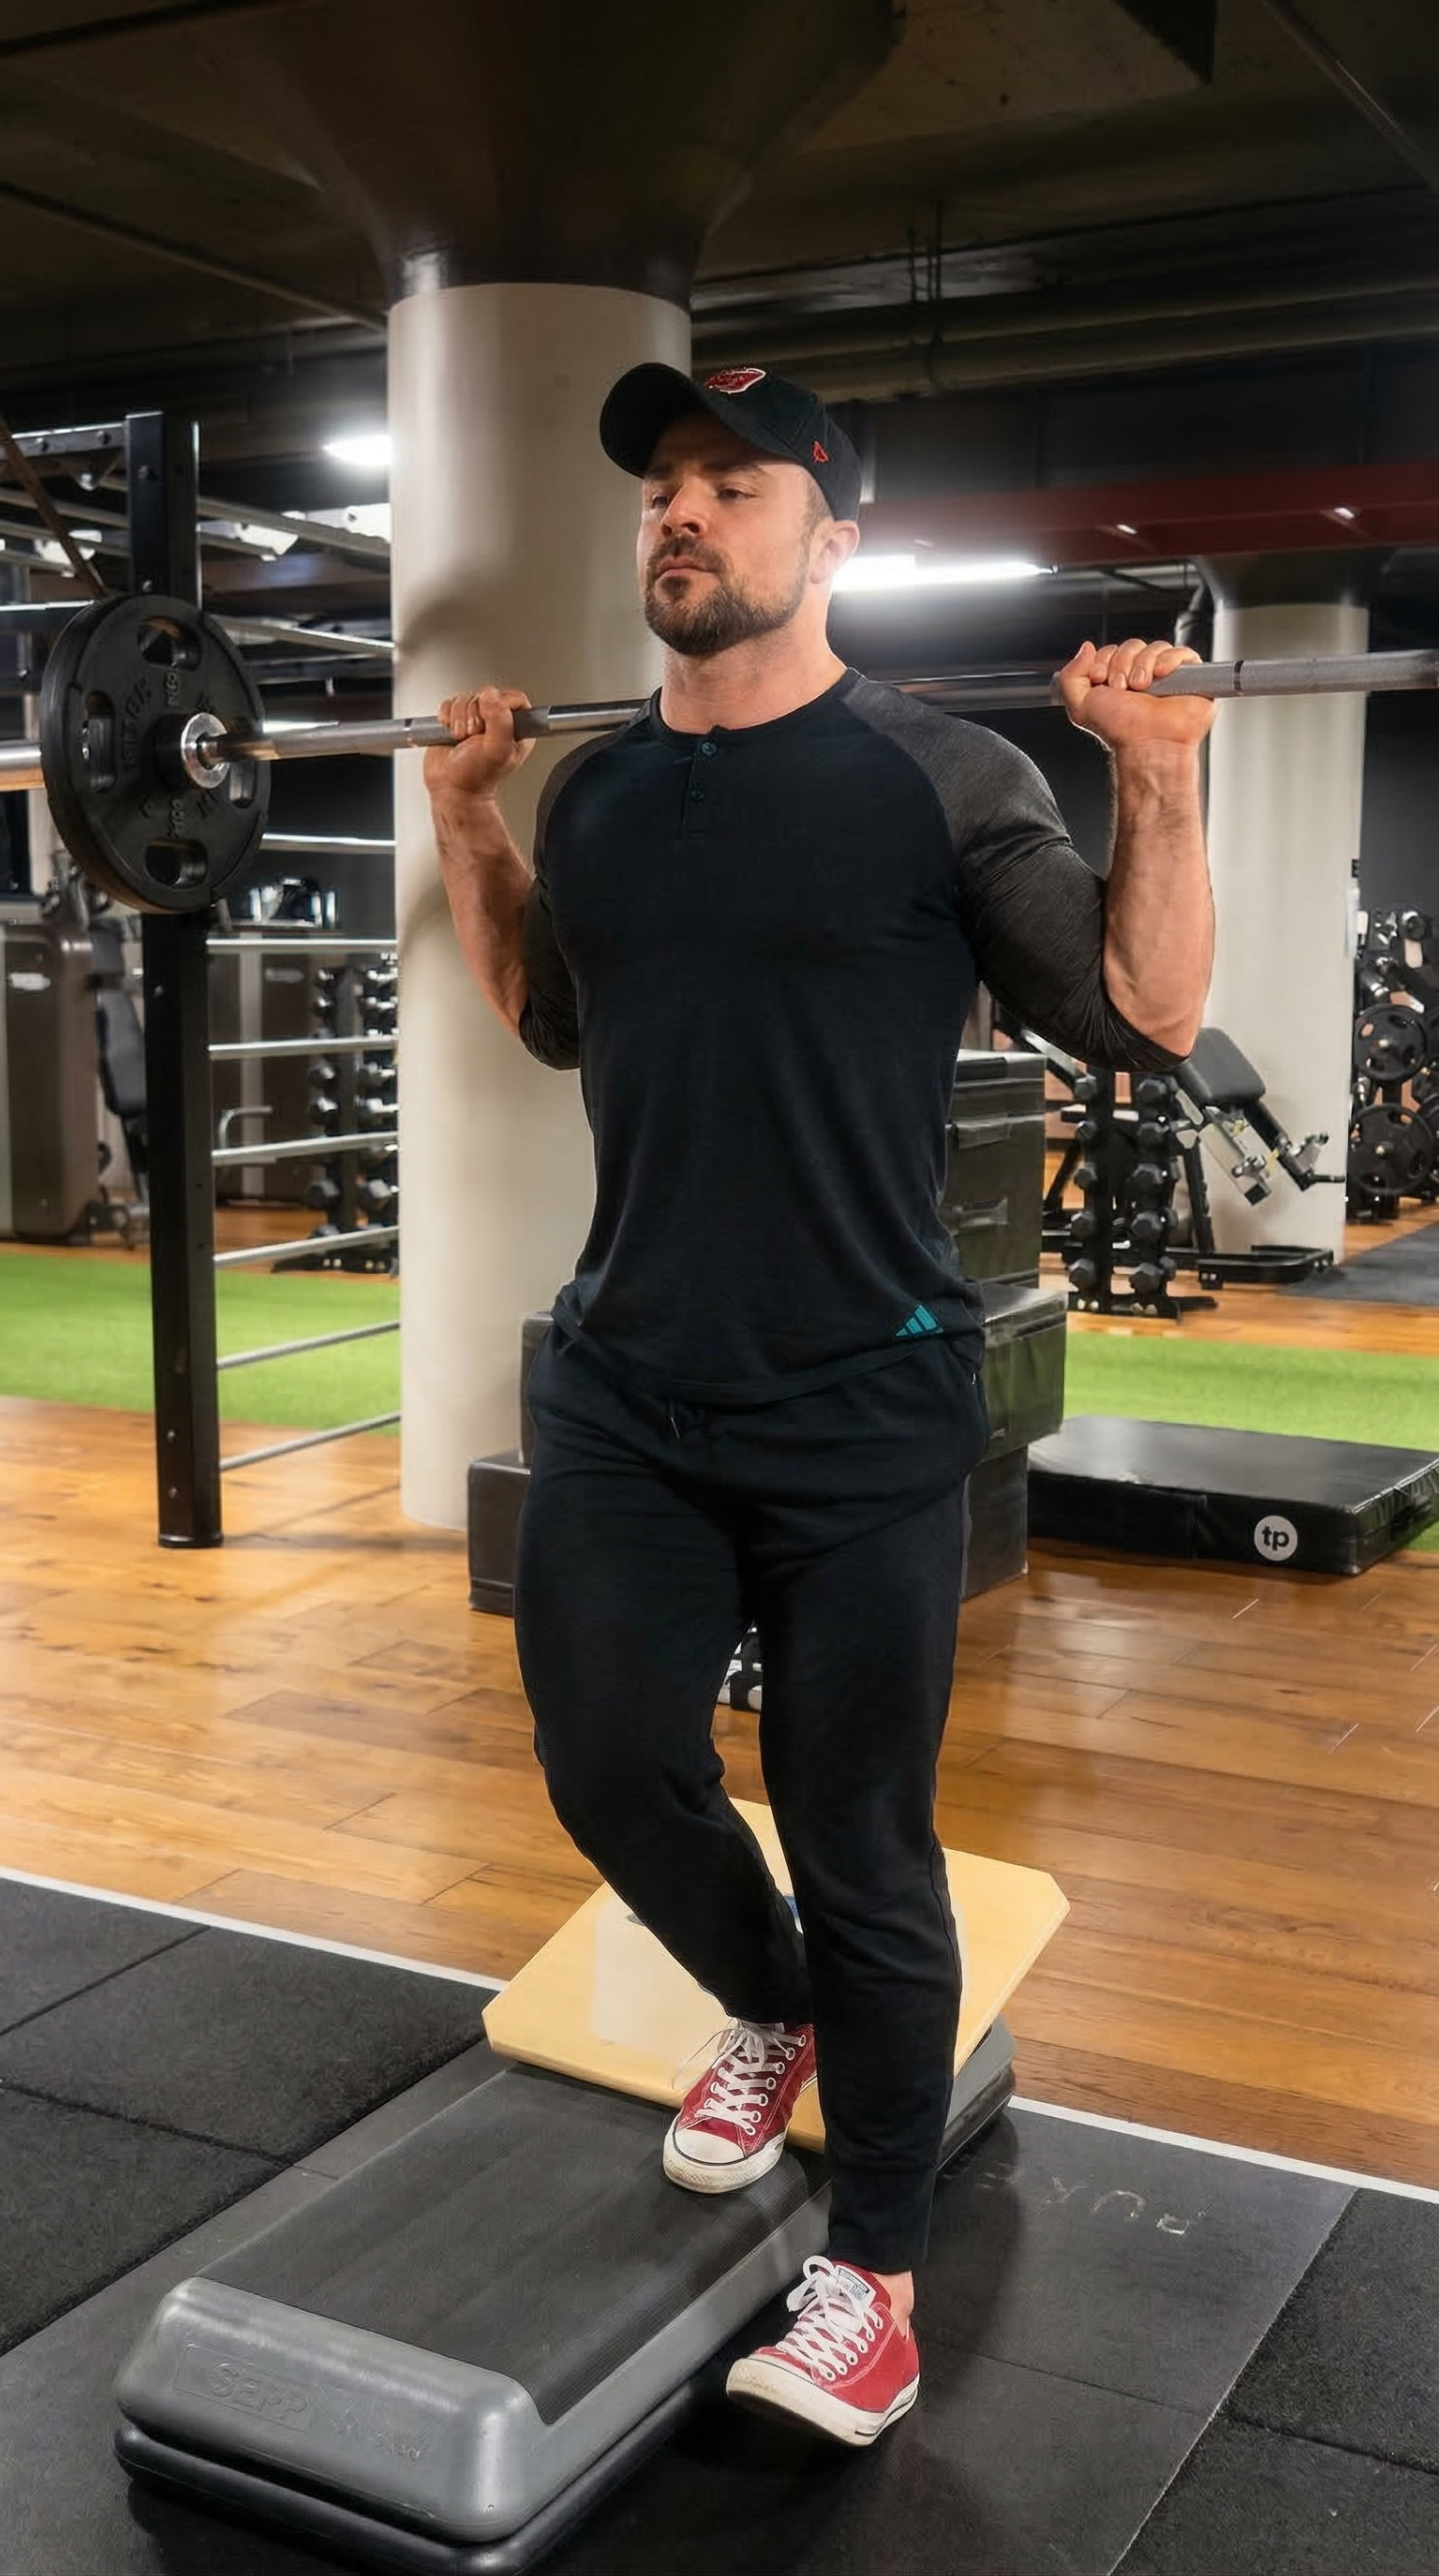
Step-Up - Poliquin - Barbell
Where to Start
Pick one thing from this article and start there. Stay consistent with it for the next 8 to 12 weeks. That will tell you more about your squat than anything else.
ANSWERED.
Why does my lower back hurt when I squat?
Start by filming yourself from the side. If your torso falls forward aggressively at the bottom, your ankles or hip flexors may be the problem. Note that depending on your limb length you might naturally lean forward more. If your lower back rounds, that’s an indication your core is weak.